

When trying to create an Azure subscription I received the following error:
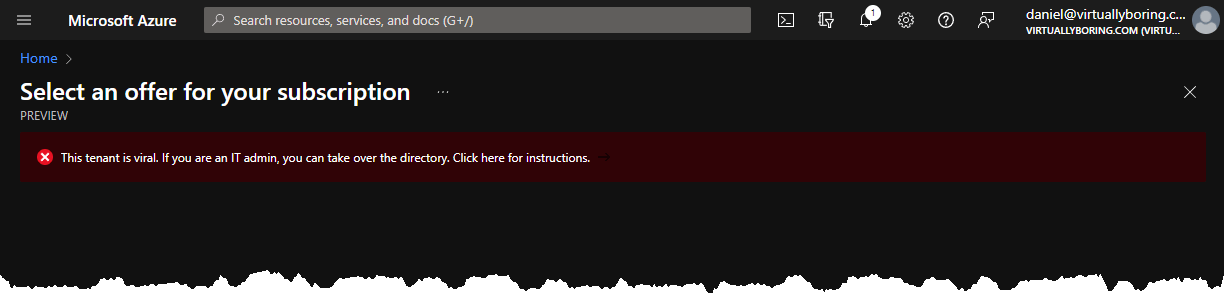
After some reading a viral tenant is another meaning for an unmanaged directory. An unmanaged directory is a directory that was automatically created when a user with @virtuallyboring.com created an Azure account. Its a directory that has no global administrator. Microsoft created a Azure Active Directory (AAD) tenant in the background and is sitting there unmanaged. This is so users can create an account and use resources without it being a blocker that the domain isn’t claimed in AAD.
There are two ways to take over an unmanaged directory:
- Internal admin takeover:
- Your account gets elevated to global administrator
- No users, domains, or service plans are migrated
- External Admin Takeover:
- Add the unmanaged domain name to a tenant where you are a Global Administrator
- A mapping of users to resources is created in your managed Azure Active Directory
- Users can continue to access services without interruption
Source: Admin takeover of an unmanaged directory – Azure AD | Microsoft Docs
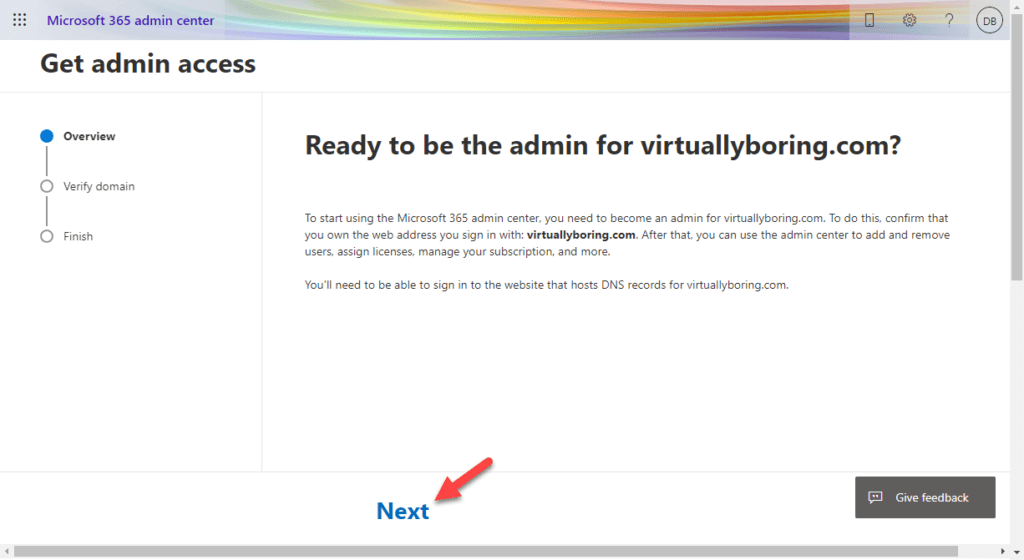
For my example I will be using a internal admin takeover.
How to do a Internal Admin Takeover:
Go to the Microsoft 365 Admin Center admin takeover URL: https://portal.office.com/admintakeover
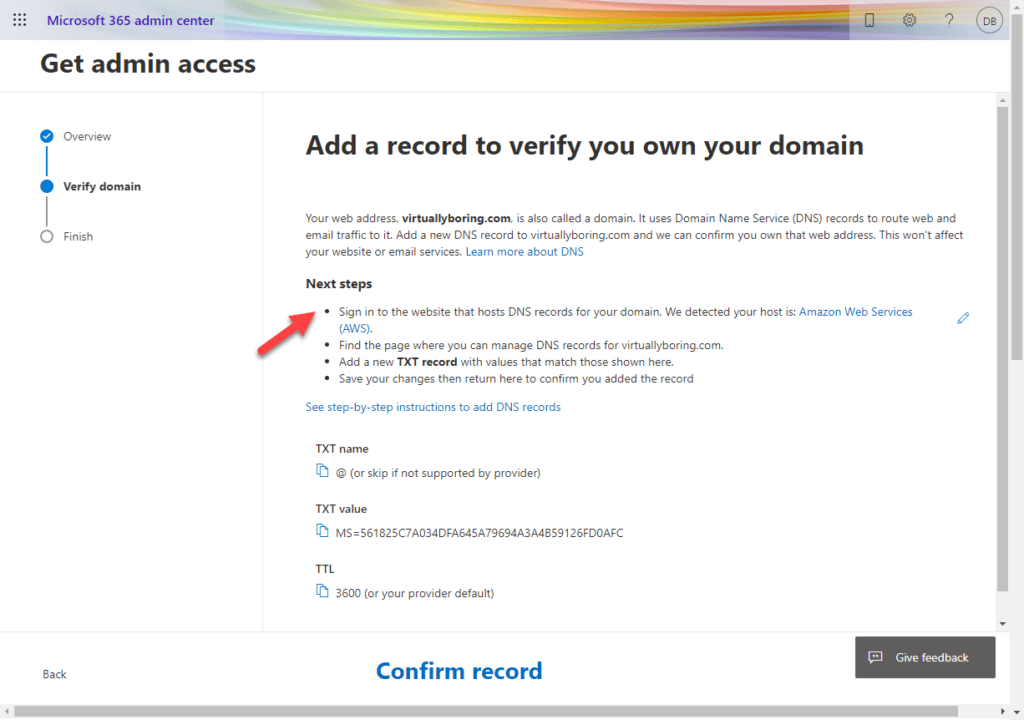
To verify you own the domain you need to create a text record in your DNS. I use Route53 in AWS to manage my DNS, that is cool that it does a check on that. We must log into Route 53 and add the text record:
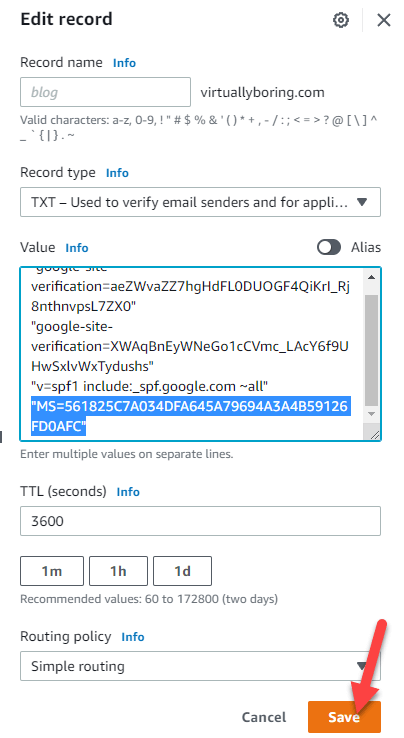
Open a new browser tab and login to your external DNS provider. In my case I use AWS Route 53. Since I already have a TXT record I am going to edit it. If this is your first TXT record then you will need to create one instead.
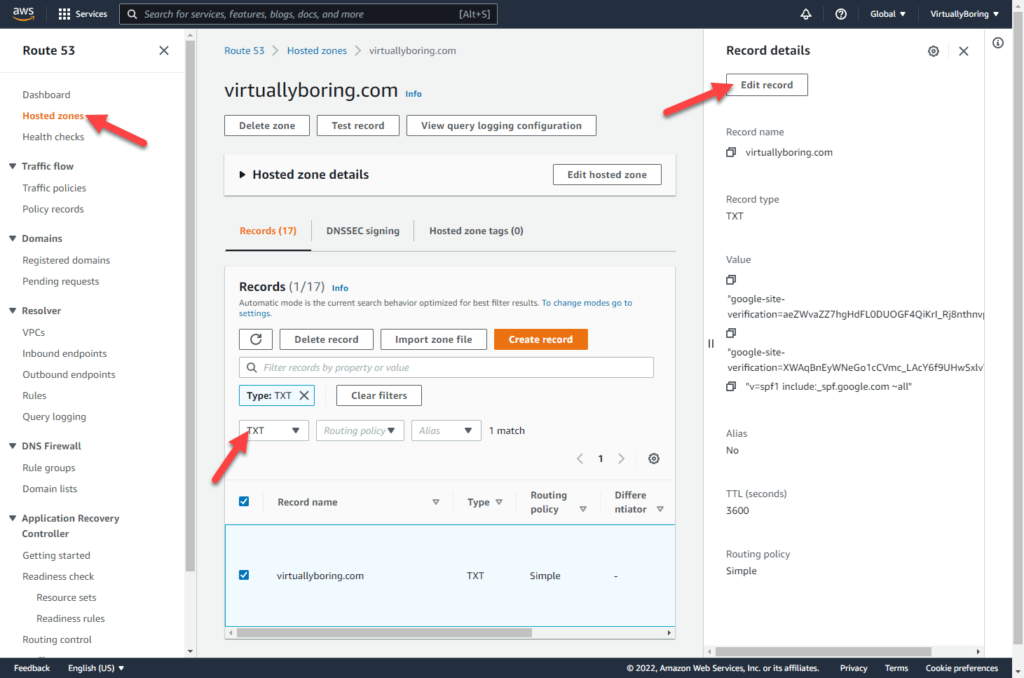
I added the verification text to the bottom of my TXT record. In Route 53 you can have multiple values on each line.
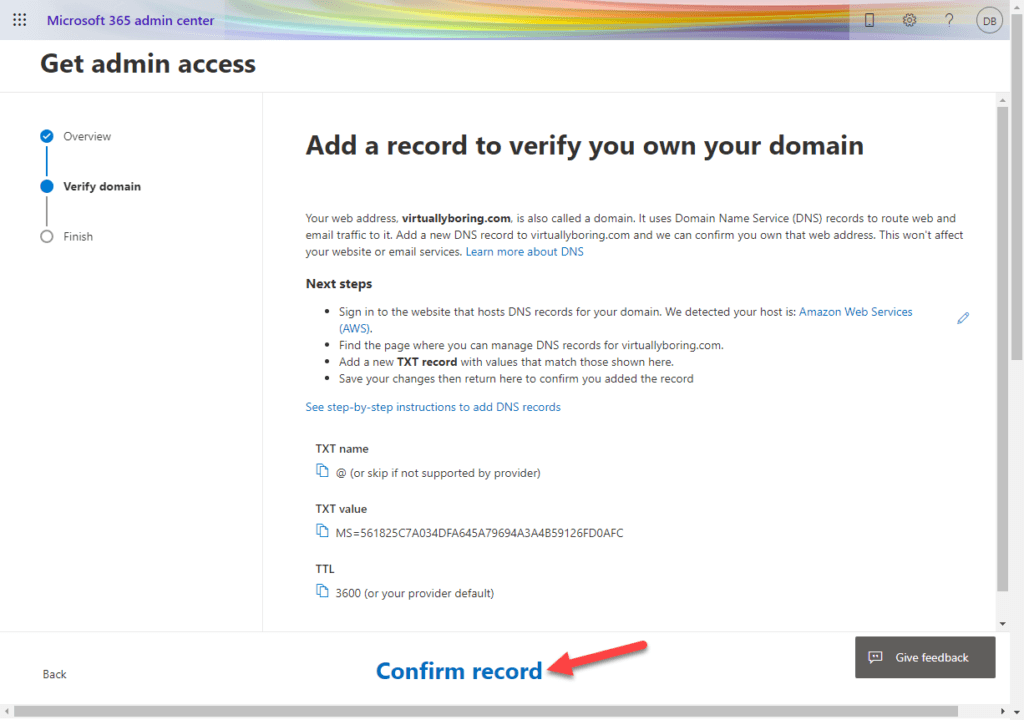
Once you get it added you can go back to your Microsoft 365 Admin Center and click Confirm Record:
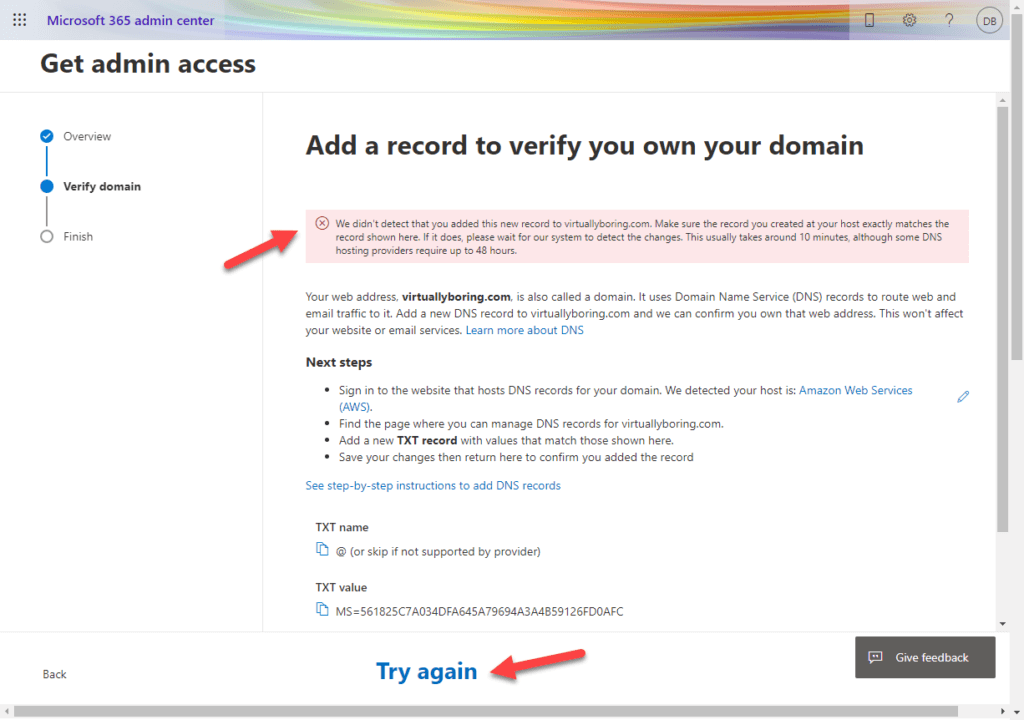
Error Check: You could get an error that Microsoft didn’t detect the verification in your TXT record. Since we are dealing with DNS, it can take 10 minutes – 1 hour for DNS to replicate out.
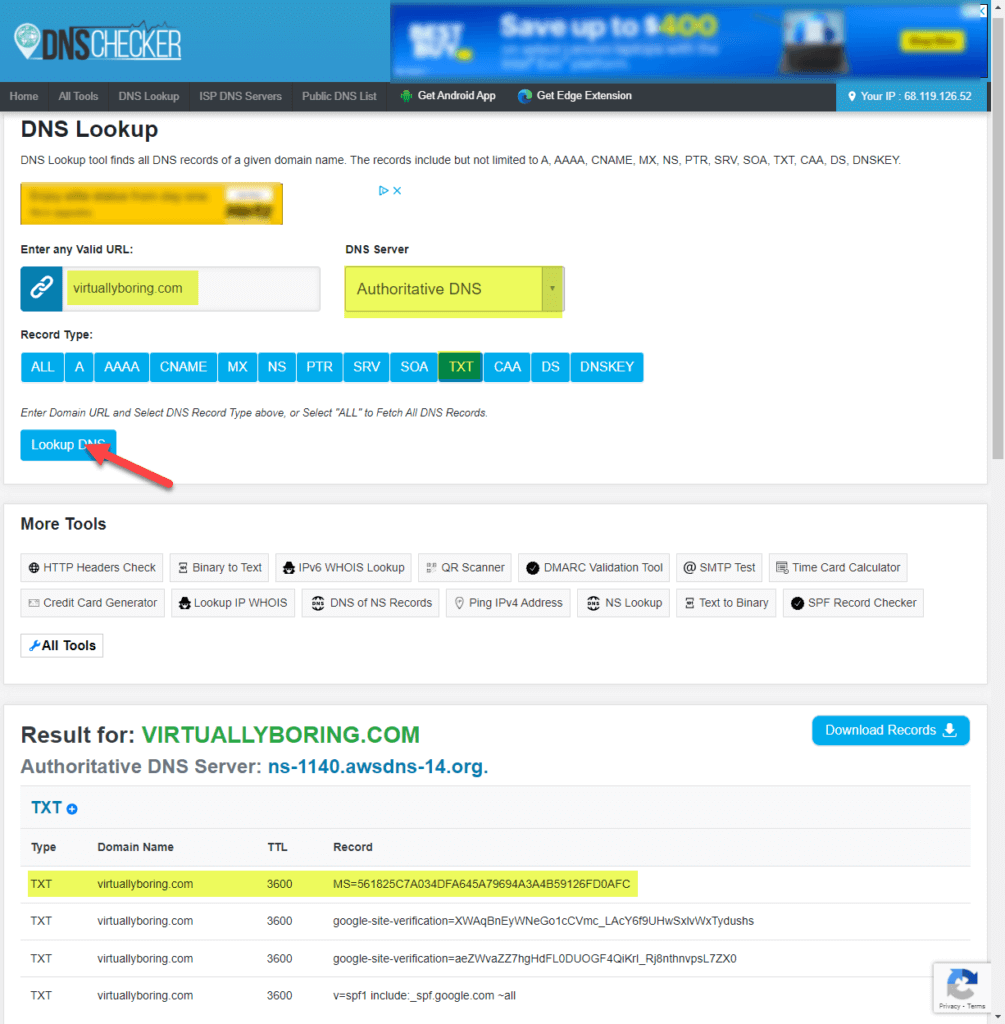
You can check DNS by using something like a DNS lookup tool: DNS Lookup – Check DNS Records (dnschecker.org)
Using the DNS Server drop down, first check Authoritative DNS, that will make sure you entered the verification TXT correctly. Next change the dropdown to something like Google or OpenDNS to see if they have picked it up yet. Once you start seeing it propagate around go back to the Microsoft 365 Admin Center and click Try Again.
Once Microsoft picks up your verification via a TXT DNS entry on your domain, you should get a success message!
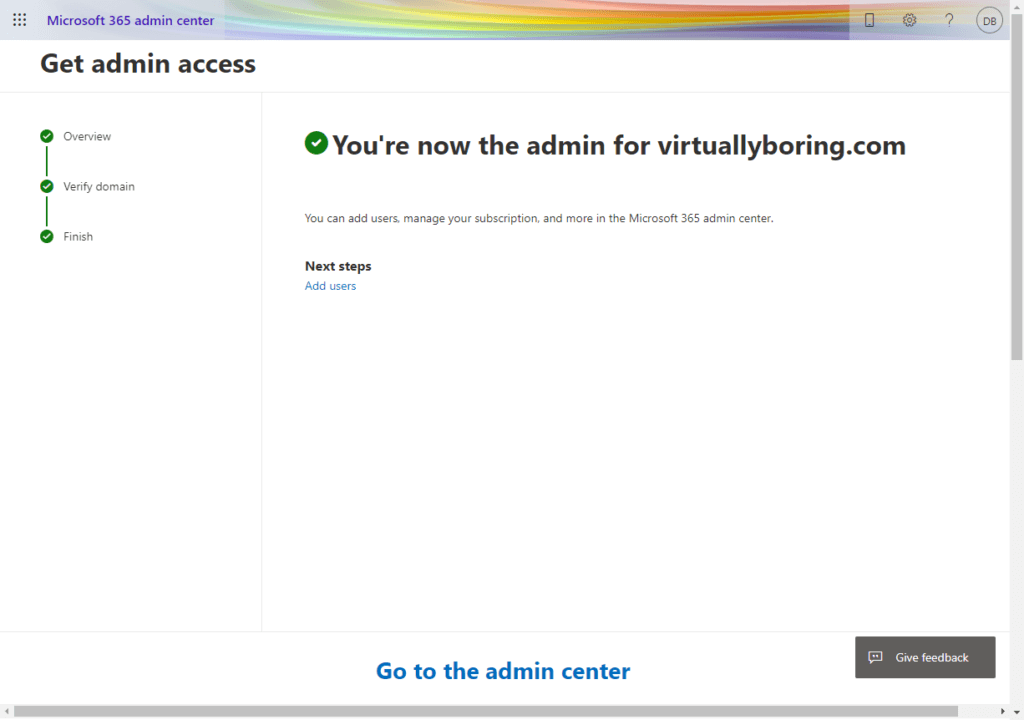
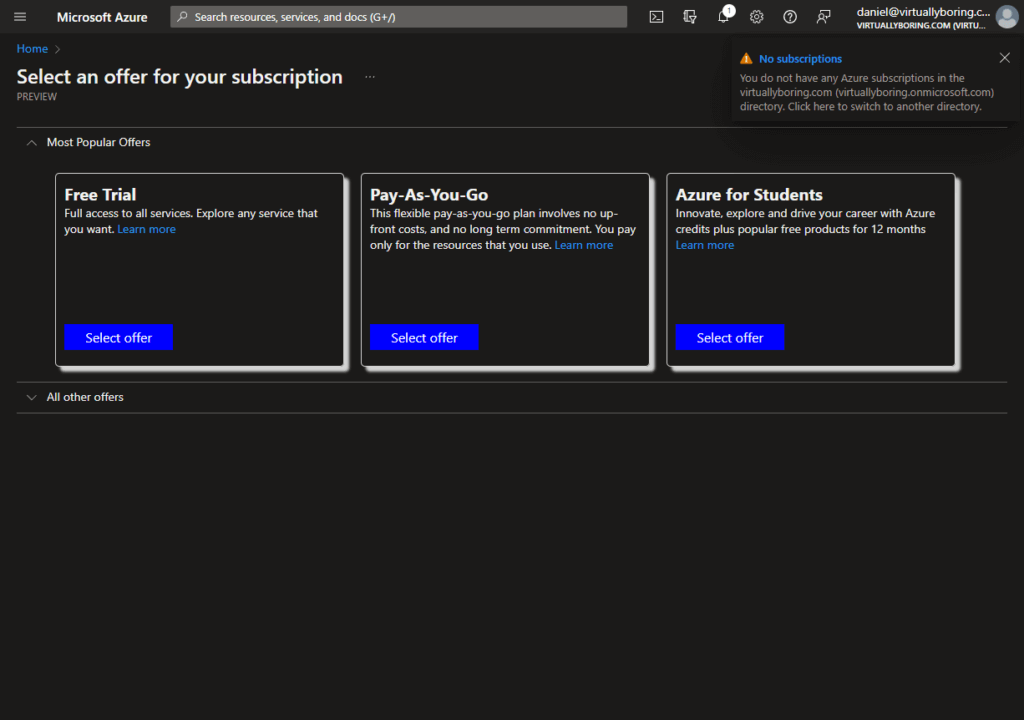
You can now create your Azure subscription and other M365 services! 🙂
Hope you found this quick walkthrough helpful!