

I started this blog back in June of 2014 to play around with platforms like Joomla and WordPress. I wouldn’t be truthful if I didn’t say the GoDaddy Superbowl commercials didn’t sell me to start with GoDaddy to register my domain name and provide hosting. Over the years I haven’t had any major issues that caused long term outages, only a few hours sprinkled in every month with their Linux Hosting Essential with CPanel plan. With 2020 being my first year working in AWS I felt strongly to move my domain over to AWS Route 53 so I can start playing around with the AWS suite of services! That is the goal of this post is to walk through the transfer my domain and DNS from GoDaddy to AWS Route 53!
These instructions are specifically for GoDaddy but would work for any domain registrar provider you are using today. The screenshots would be different but the task would be the same. You have to switch back and forth between GoDaddy console and AWS Console quite a bit. I try to start the task stating if a console swap is need and where you should be. Working with DNS can be tricky as it can be a waiting game especially when dealing with external DNS replicated across the world (Time To Live – TTL). If doing this in a production environment make sure you do this during a low peak time and give yourself extra window of time to troubleshoot (and wait for DNS replication). It’s pretty easy and straight forward, but it’s DNS.
What exactly is Route 53? Route 53 is Amazon Web Services (AWS) highly available and scalable Domain Name System (DNS) service launched back in 2010. It has powerful traffic routing policies and health checks that you use depending on your use case. Route 53 has a default limit of 50 domain names however this limit can be increased by contacting AWS support.
Table of Contents:
Part 1: Migrate from GoDaddy DNS to AWS Route 53
- Step 1: Create AWS Route 53 Hosted Zone
- Step 2: Export Zone File Information from GoDaddy and Import into Route 53
- Step 3: Update Name Servers on current DNS Provider (GoDaddy)
Part 2: Migrate domain registered with GoDaddy to AWS Route 53
- Step 1: GoDaddy Domain Transfer Prep – Remove Ownership and Domain Lock
- Step 2: Get your GoDaddy Transfer Authorization Code
- Step 3: Transfer Domain to AWS Route 53
Part 1 – Migrate from GoDaddy DNS to AWS Route 53:
Step 1: Create AWS Route 53 Hosted Zone
What is a AWS Hosted Zone? Here is a snippet from the Route 53 FAQ:
A hosted zone is an Amazon Route 53 concept. A hosted zone is analogous to a traditional DNS zone file; it represents a collection of records that can be managed together, belonging to a single parent domain name. All resource record sets within a hosted zone must have the hosted zone’s domain name as a suffix. For example, the amazon.com hosted zone may contain records named www.amazon.com, and www.aws.amazon.com, but not a record named www.amazon.ca. You can use the Route 53 Management Console or API to create, inspect, modify, and delete hosted zones. You can also use the Management Console or API to register new domain names and transfer existing domain names into Route 53’s management.
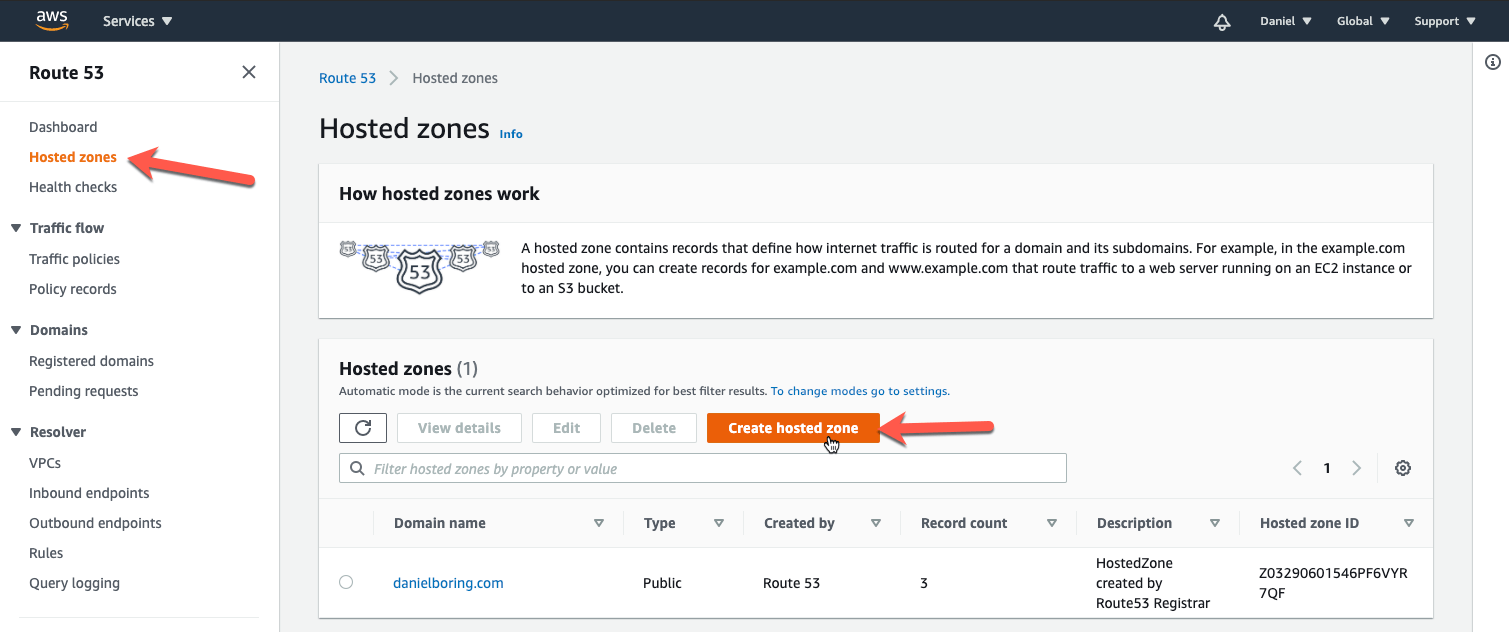
First we must create the Hosted Zone in Route 53. This is so we can get our Amazon Name Servers for use in a later step. Go to Route 53 in the AWS console, then click Hosted Zones on the left column, then Create Hosted Zone:
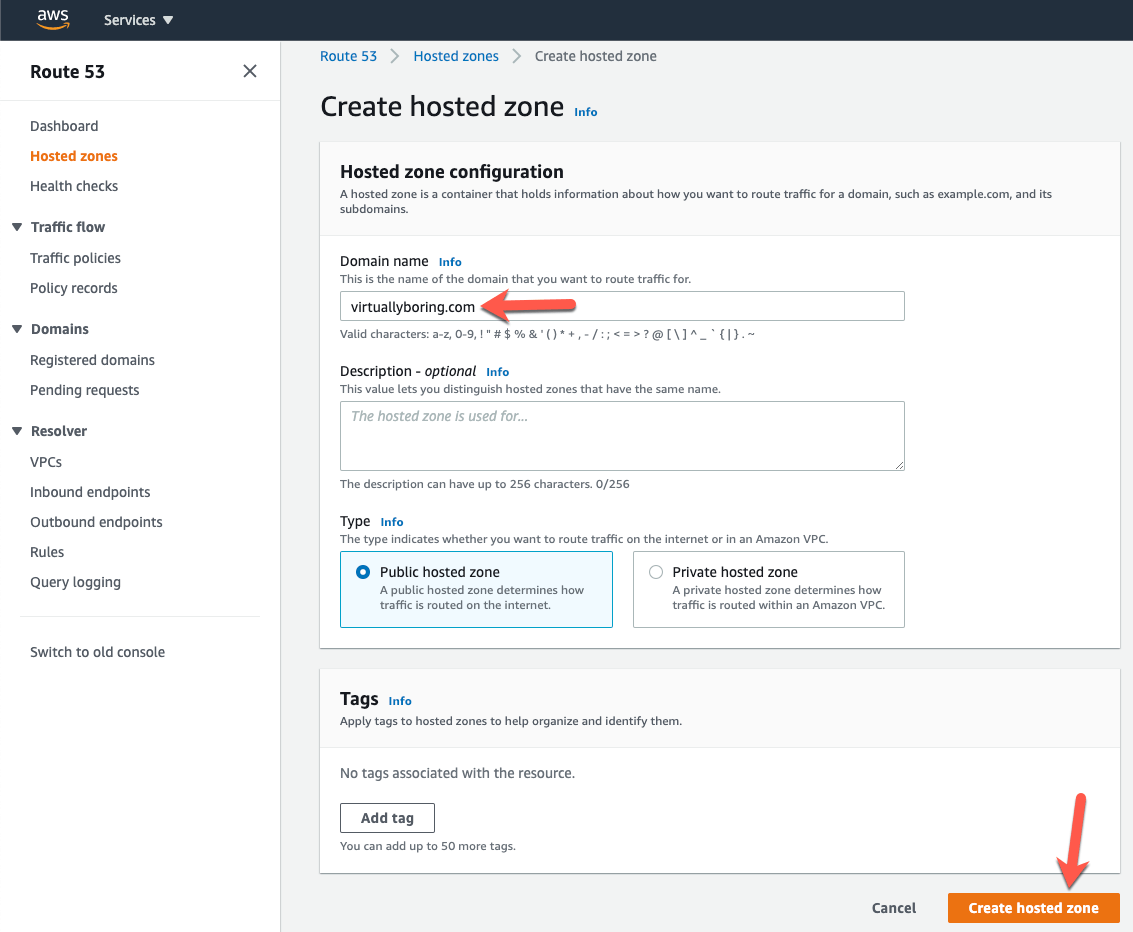
Enter your domain name that you wanted to transfer over, select Public Hosted Zone for type, add tags if applicable, then click Create Hosted Zone:
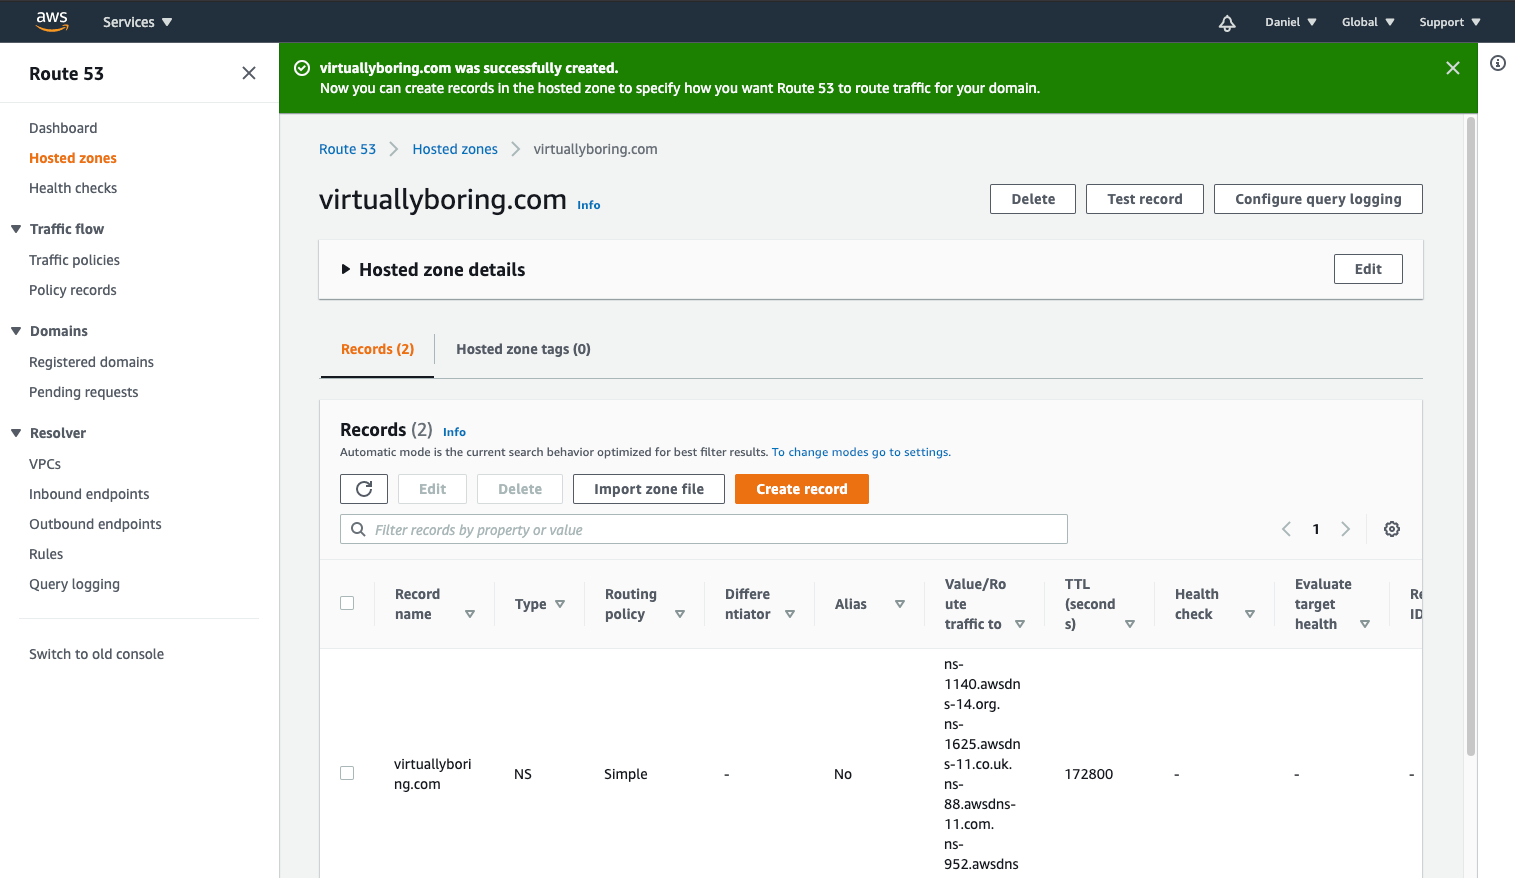
Should see a green message stating successfully created:
Step 2: Export Zone File Information from GoDaddy and Import into Route 53:
This part is performed in your GoDaddy account: We need to export the DNS Zone File. A DNS Zone File is a plain text file of your current DNS configuration, it contains all your current records and their values (A, CNAME, Alias, etc).
Select the file for the version of your operating system:
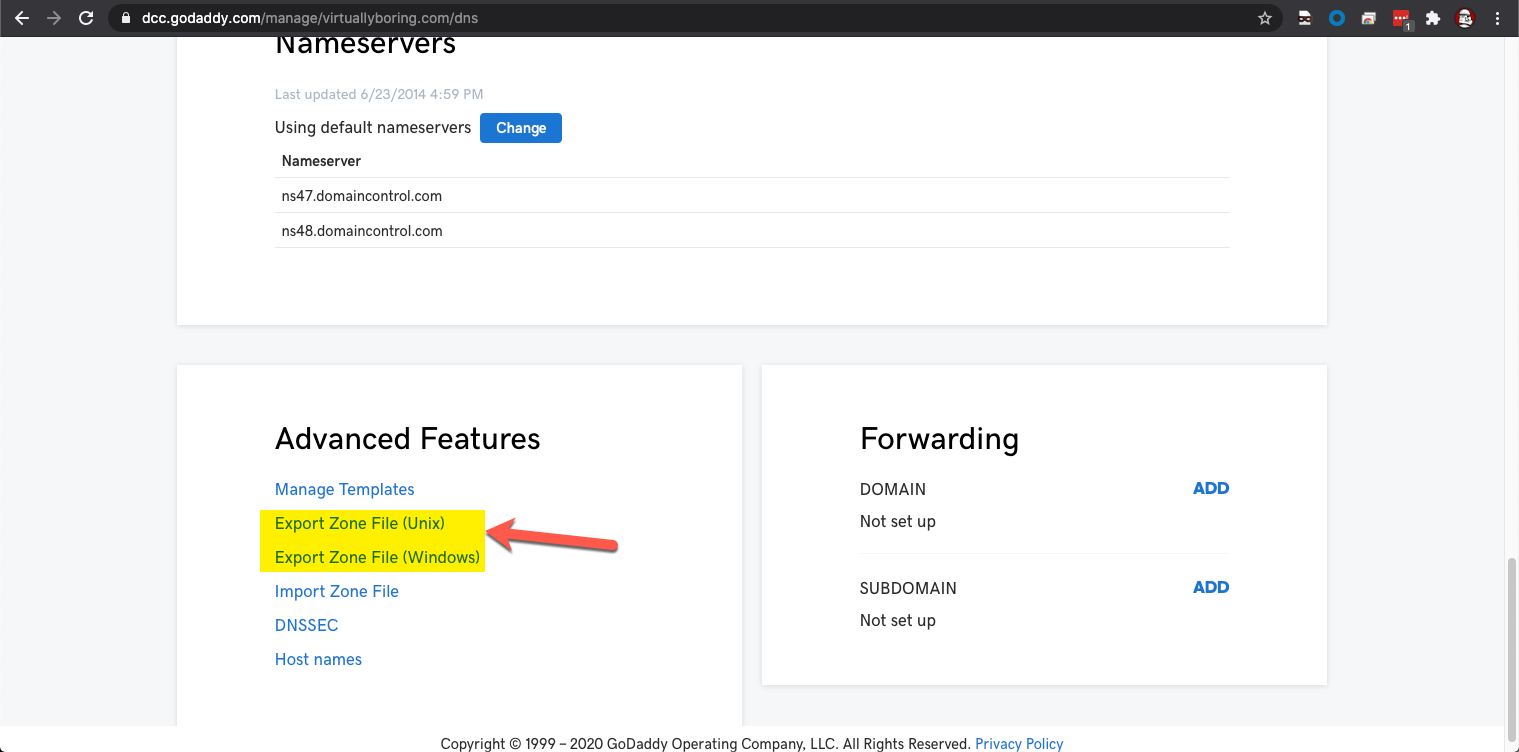
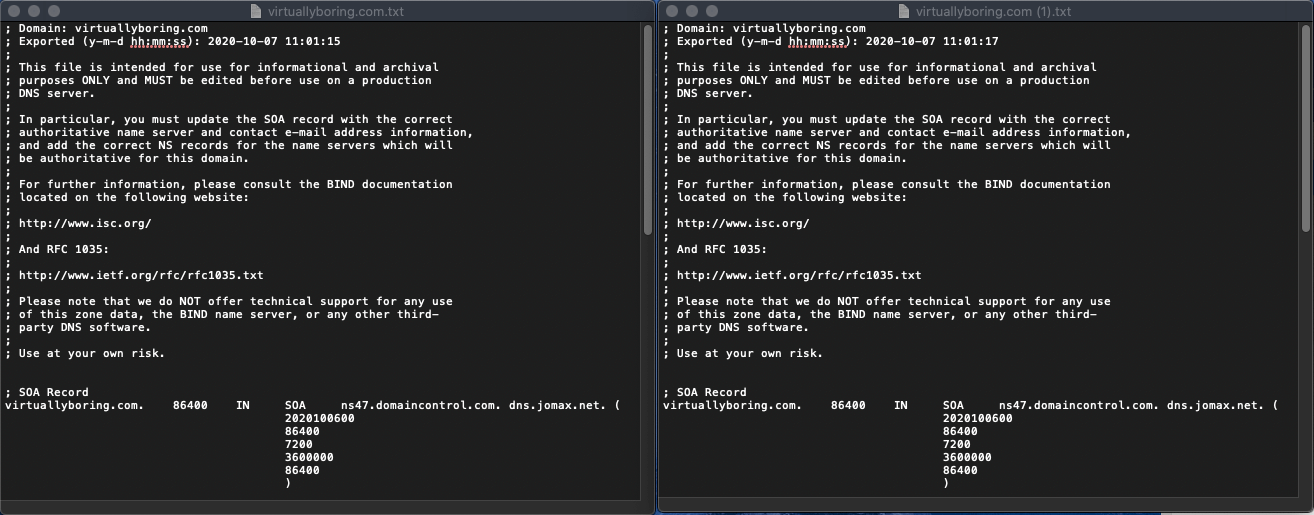
FYI: I checked both Unix and Windows version to see what is different, I don’t think it really matters which version because both versions look the same…
Unix Left, Windows Right:
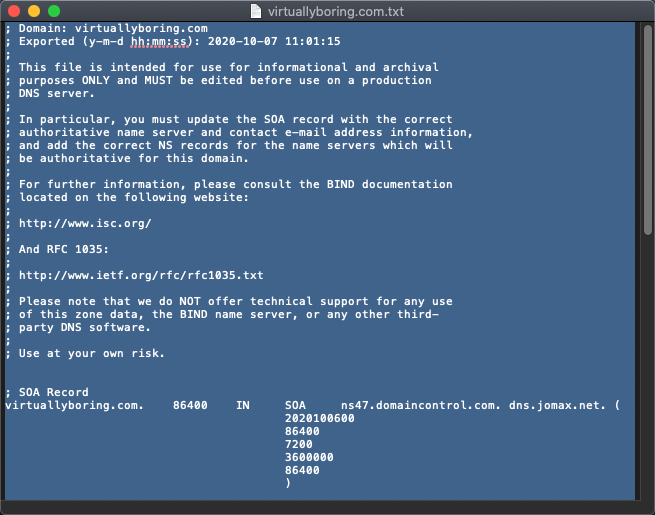
Copy everything to your clipboard:
Advanced Users: You can delete the SOA and NS Records of the Zone File. We won’t need it going forward as they are for the current DNS provider. If you’re not sure how you can skip this and copy everything (like I did the first time)!
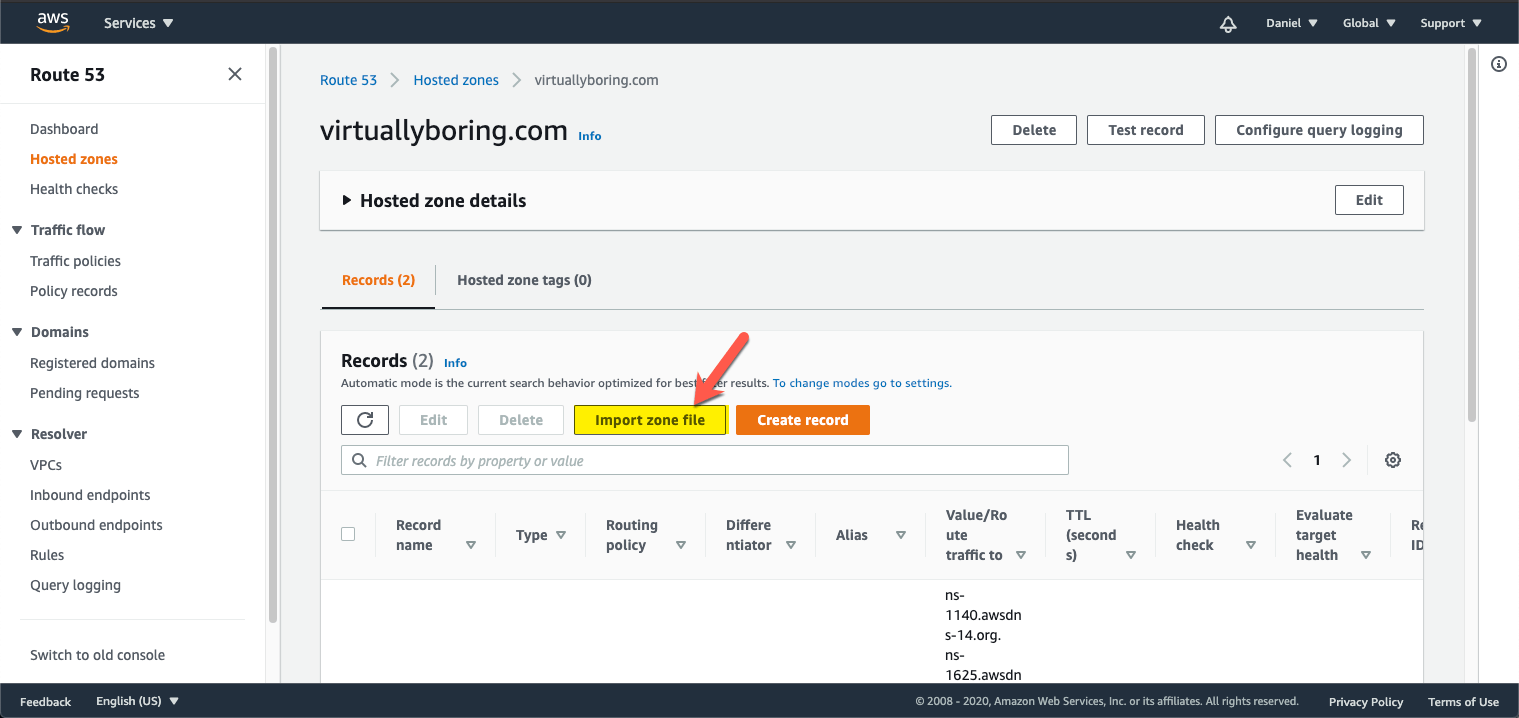
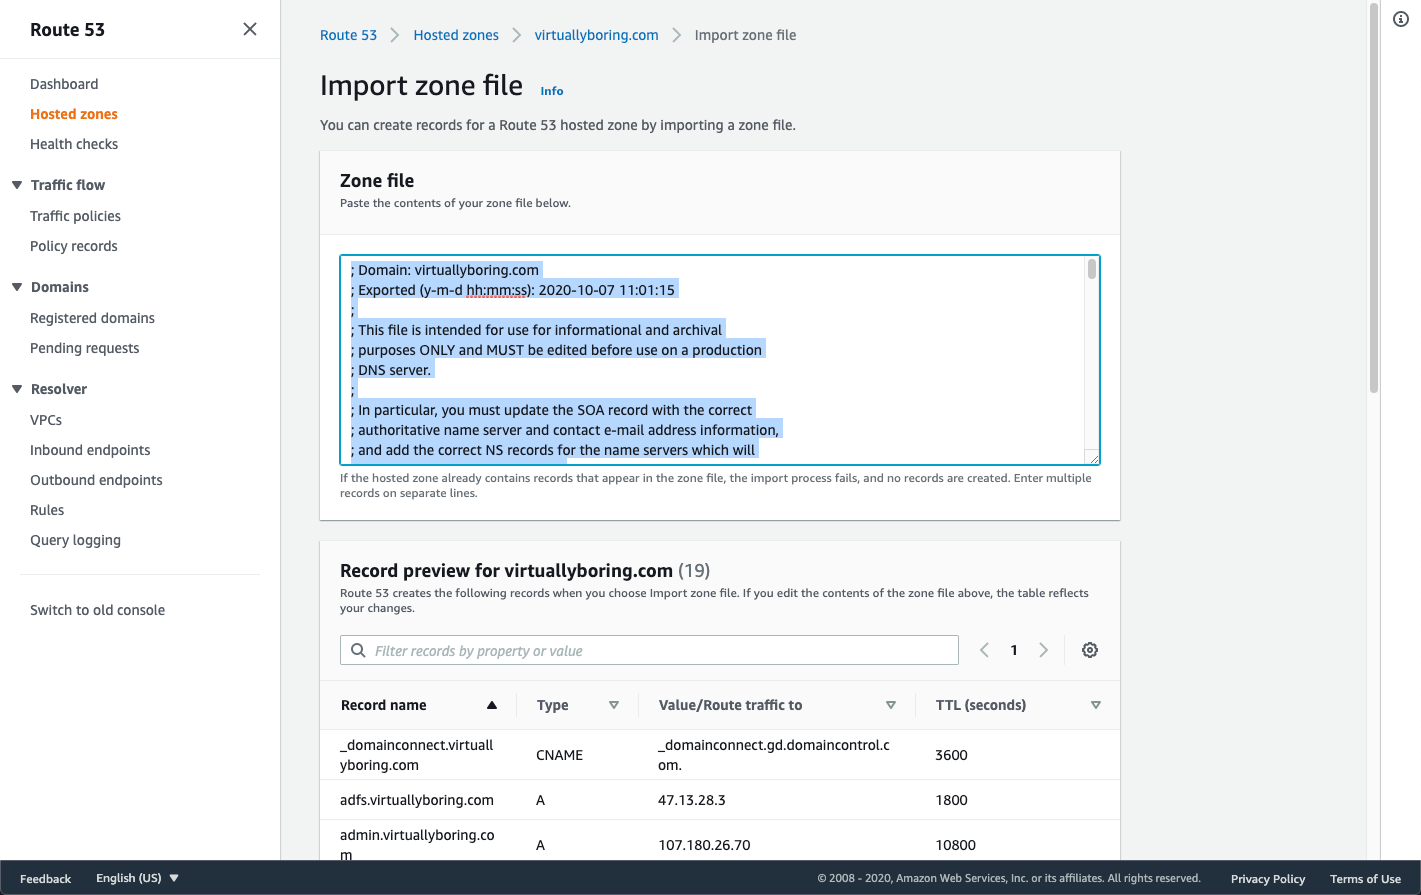
Switch to your AWS Console: Back in the AWS Route 53, click your Hosted Zone we created in Step 1, then click Import Zone File:
Paste the contents from your clipboard (should be the DNS Zone File contents) then click Import:
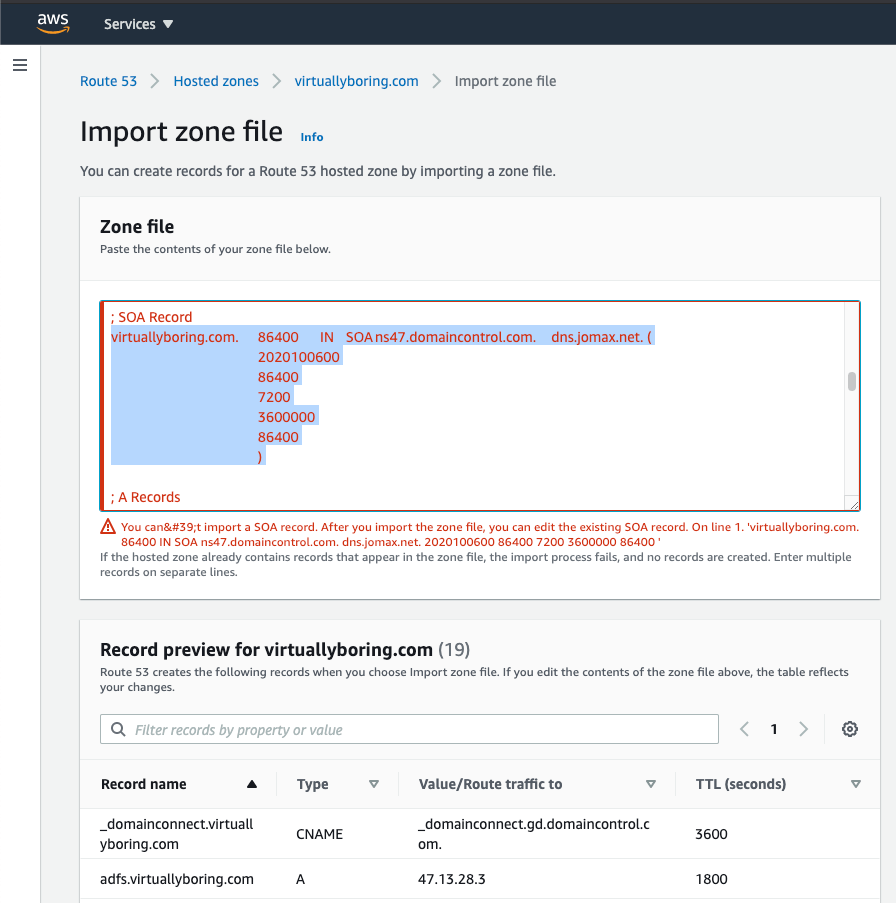
Error Catch: If you did not remove the SOA and NS records from the downloaded Zone File you will get the following red text error. This error happened because the SOA records were created when we made the Hosted Zone in AWS during the very first step, and we have new nameservers with AWS versus existing ones in GoDaddy.
You will need to delete the SOA data below the ; SOA Record (highlighted below) and the ; NS Records then click Import:
Additional Information: SOA stands for Start of Authority record. It contains the following information:
- The name of the server that supplied the data for the zone.
- The administrator of the zone.
- The current version of the data file.
- The default number of seconds for the time-to-live file on resource records.
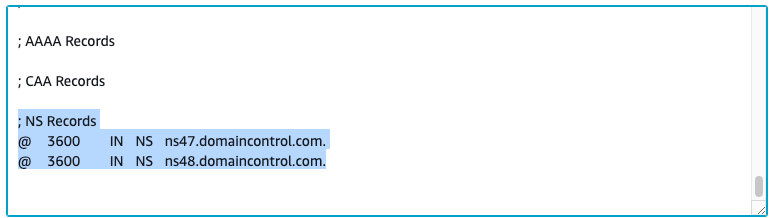
NS Records aren’t needed and can be deleted as highlighted:
Once you get the SOA Record and NS Records deleted, you should get a green message stating successfully created. Scroll through to make sure all your records look correct. Good opportunity to delete any that you don’t want anymore:
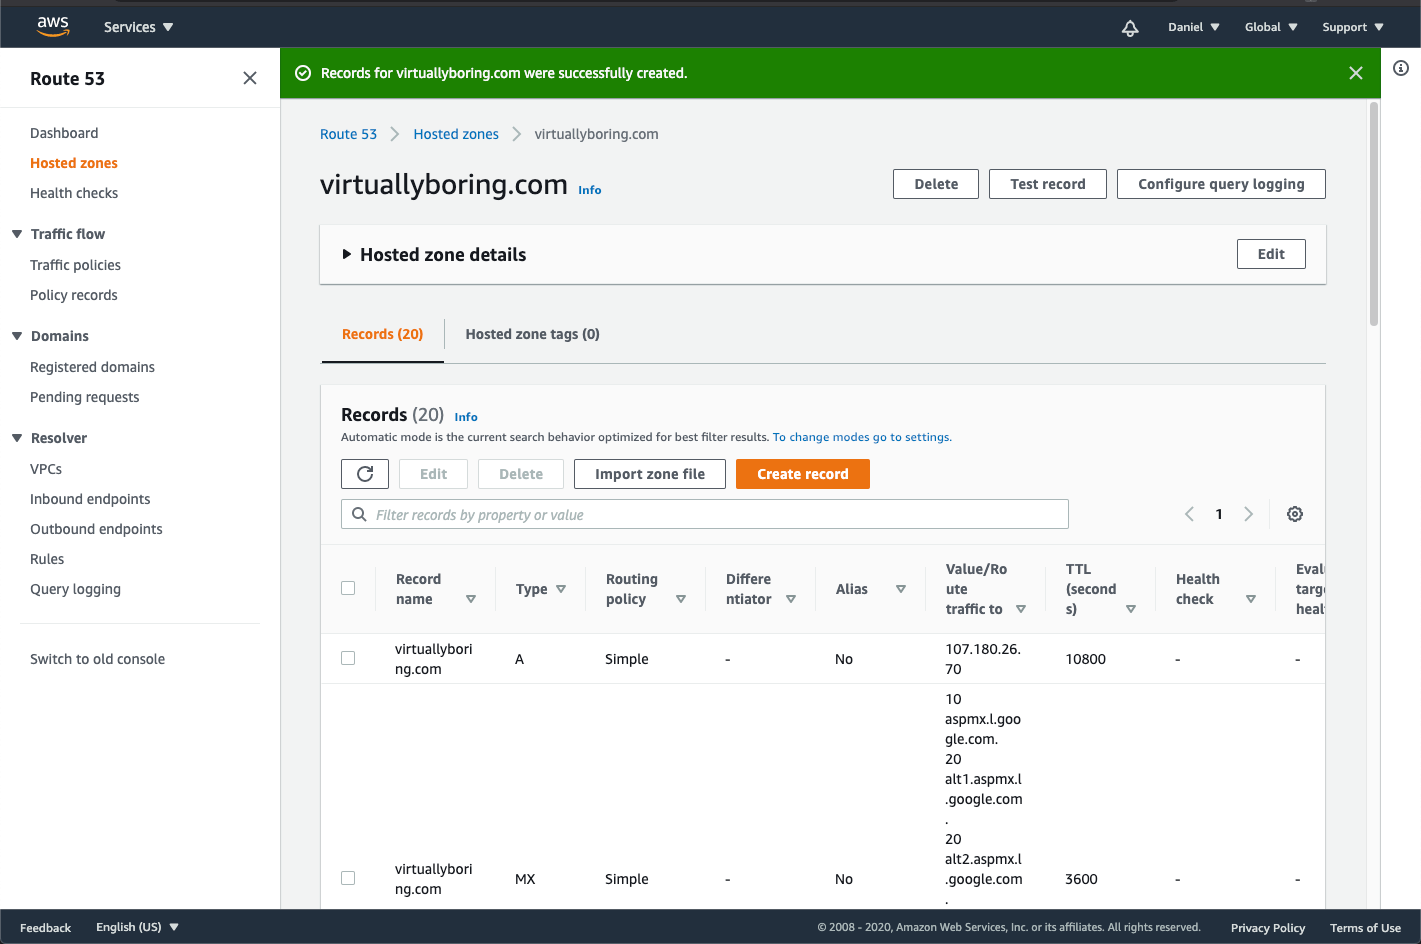
On this same screen expand the Hosted Zone Details pane and copy the Name Servers to a Notepad so we can copy/paste them in the next steps:

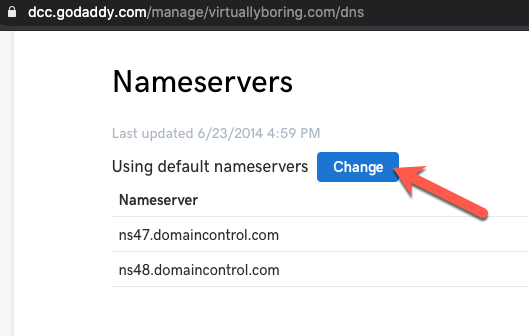
Step 3: Update Name Servers in GoDaddy:
Now that Route 53 has all of our DNS records we can switch the name servers to the AWS Name Servers. This will let Route 53 start serving DNS requests instead of GoDaddy.
GoDaddy Console: Back in the GoDaddy DNS console there is the option to Change the default nameservers, click Change:
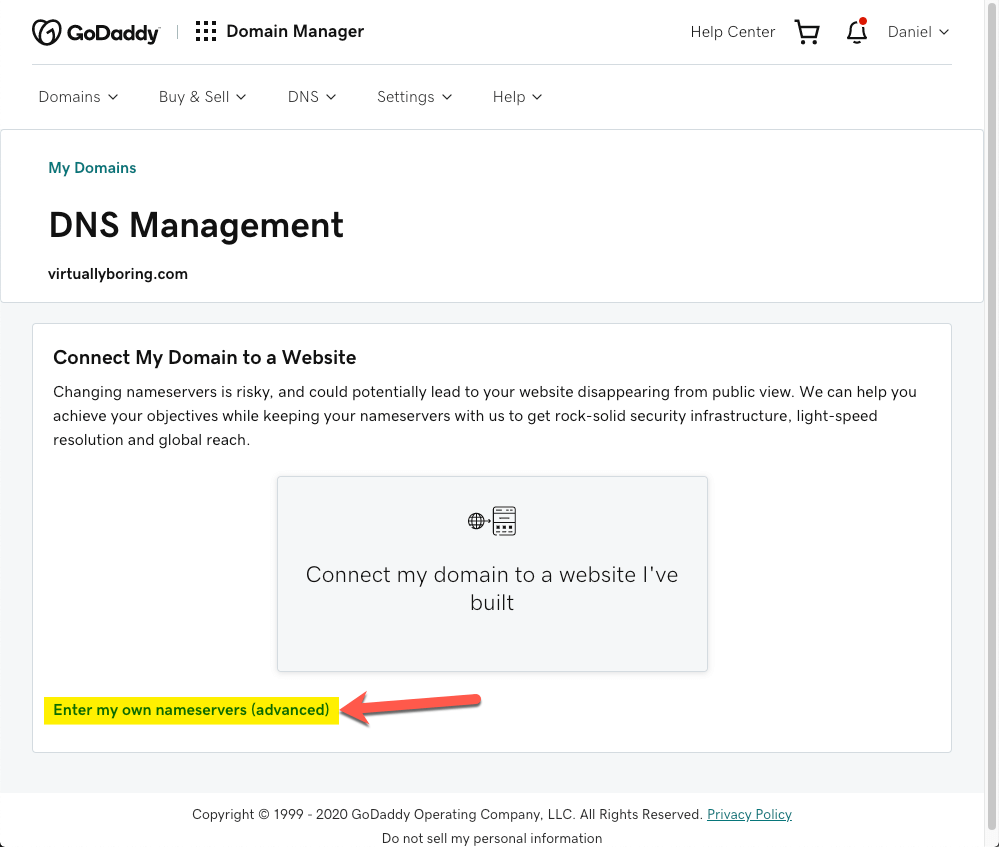
Click Enter my own nameservers (advanced):
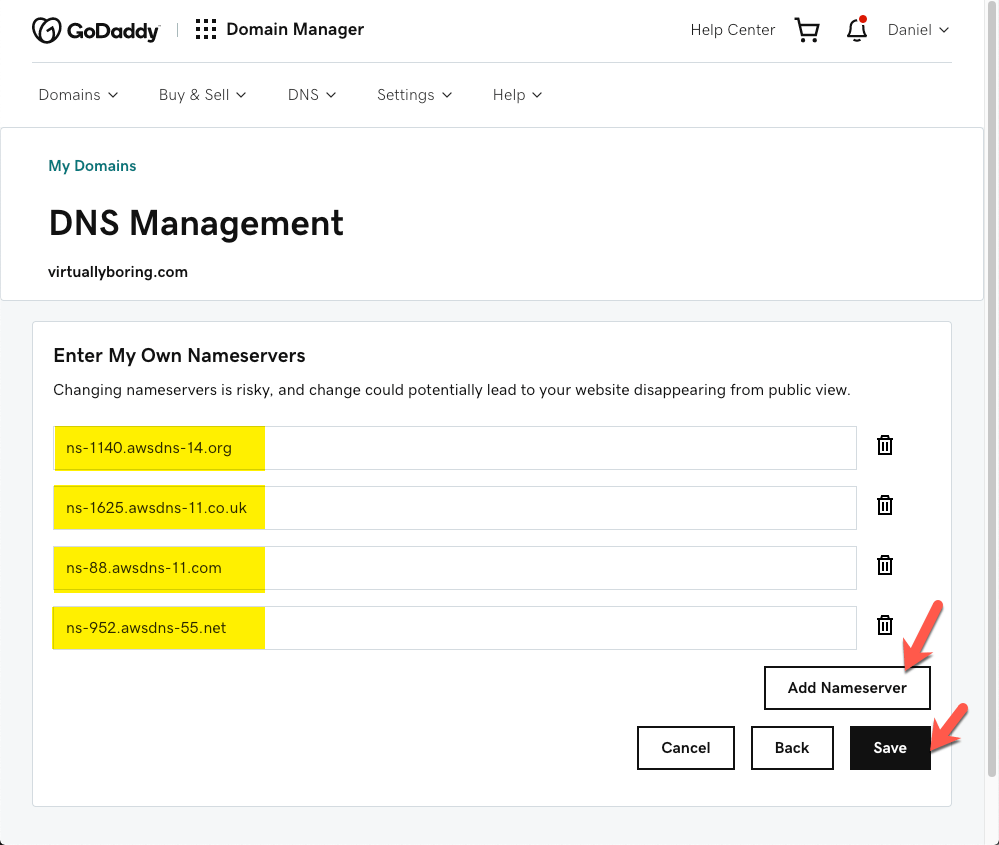
You will first change the drop down menu from Default to Custom, then on each line copy/paste the Name Server from Route 53 that we copied earlier. You will have to click Add Nameserver so you can get all your entries on there. Once you get the information entered click Save:
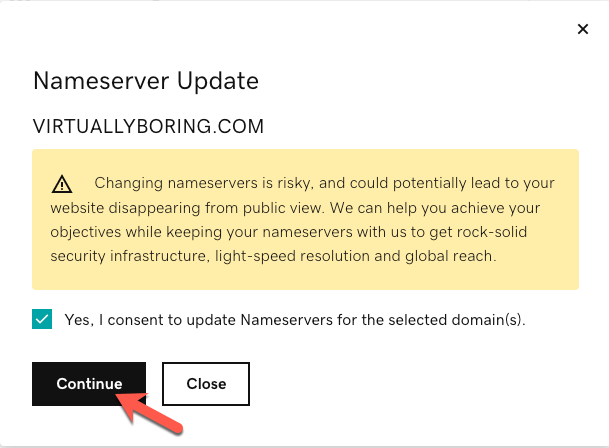
This is a high impacting risk change, meaning the global DNS records external users use to access your domain will be changed from GoDaddy to AWS. Highly recommend you do this after hours and know that when dealing anything with DNS there is a time sync (TTL).
If you are good with the possible risks to DNS check the box to accept then click Continue:
If you have GoDaddy Ownership Protection enabled you should see a purple banner stating you should have a email or Two Factor Authentication request to confirm the change of your nameservers.
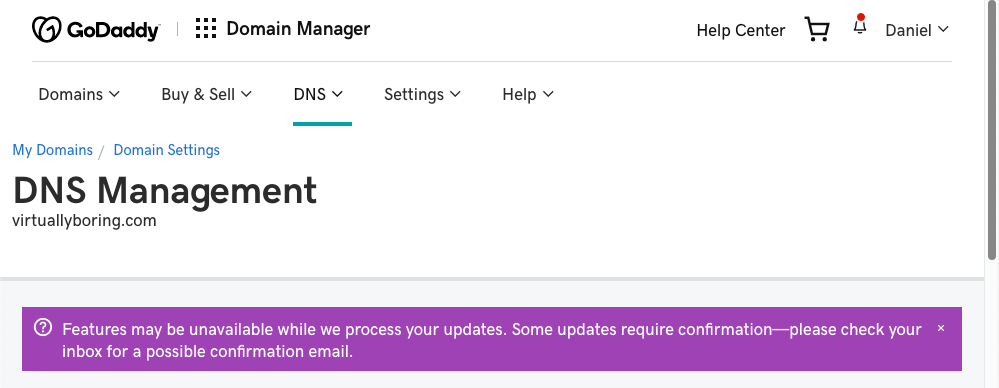
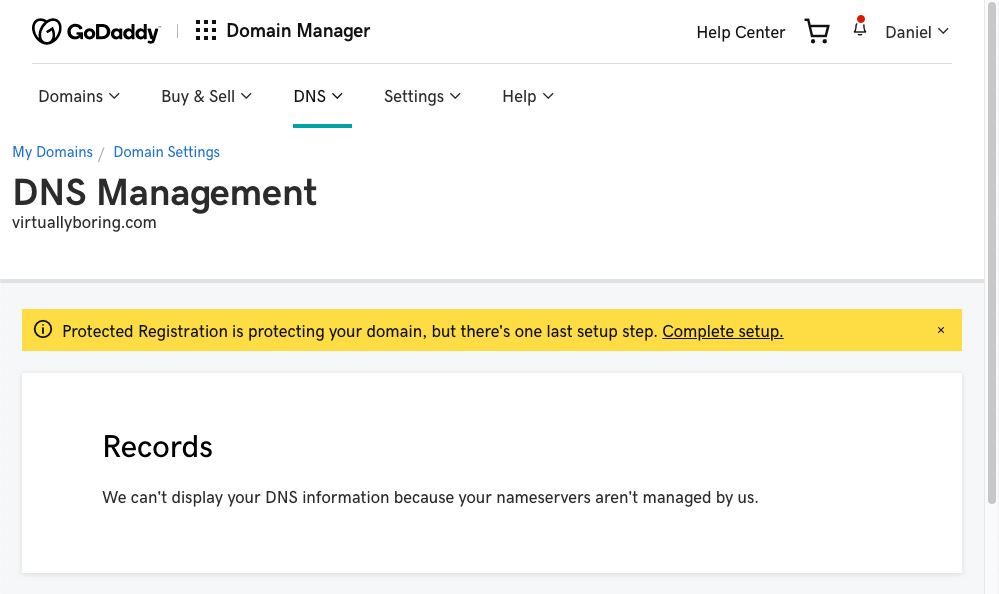
Once you confirm the change or if you didn’t have GoDaddy Ownership Protection enabled, the DNS console it will state they cannot display your DNS settings because they no longer manage them and now AWS Route 53!
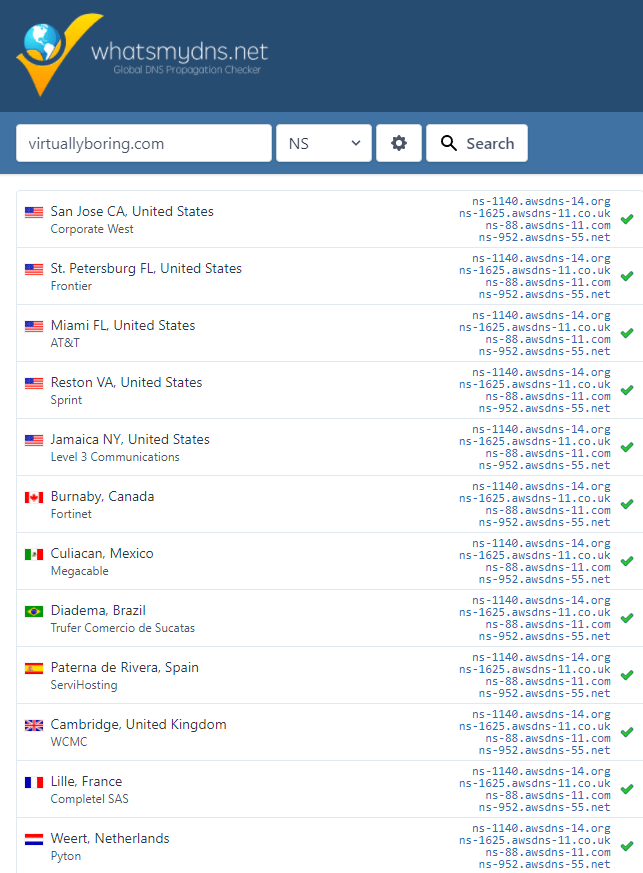
Now We Wait: Since this is DNS we are working with we have to wait for the TTL (Time To Live) to expire and global DNS servers start refreshing records. To check this externally you can use a third party website like https://www.whatsmydns.net/
Enter your domain name, change the drop down to NS (Nameserver) then click Search, this will show you what DNS servers around the globe are reporting back with as they sync:
Part 1 Completed!
At this point your domain should still be registered with GoDaddy but AWS Route 53 is serving the DNS requests for it! The next section is for how to transfer your domain ownership from GoDaddy to Route 53.
Part 2 – Migrate domain from GoDaddy to AWS Route 53:
Step 1 – GoDaddy Domain Transfer Prep – Remove Ownership Protection and Domain Lock:
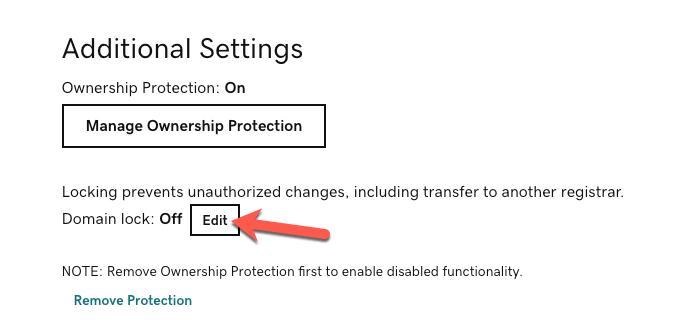
In GoDaddy console: Under your Domain Settings scroll to the bottom to Additional Settings, both Ownership Protection AND Domain Lock will need to be Off in order to transfer your domain outside of GoDaddy.
Follow these GoDaddy instructions to remove them:
- Downgrade my domain protection plan | Domains – GoDaddy Help US
- Unlock my domain for transfer | Domains – GoDaddy Help US
Step 2 – Get your GoDaddy Transfer Authorization Code:
Once your Ownership Protection AND Domain Lock is showing off you will now need a authorization code. Think of this like security “two factor” authentication to port your domain out of GoDaddy.
Transfer my domain away from GoDaddy | Domains – GoDaddy Help US
Step 3 – Transfer Domain to AWS Route 53:
Now we have the domain in GoDaddy prepped to migrate over to AWS! Back in the AWS Console in Route 53, under Registered Domains click Transfer Domain:
![]()
Enter the domain name you want to transfer, it will do a check to see if there is a domain lock enabled. Should come back green from our work in Step 1, click Continue:
![]()
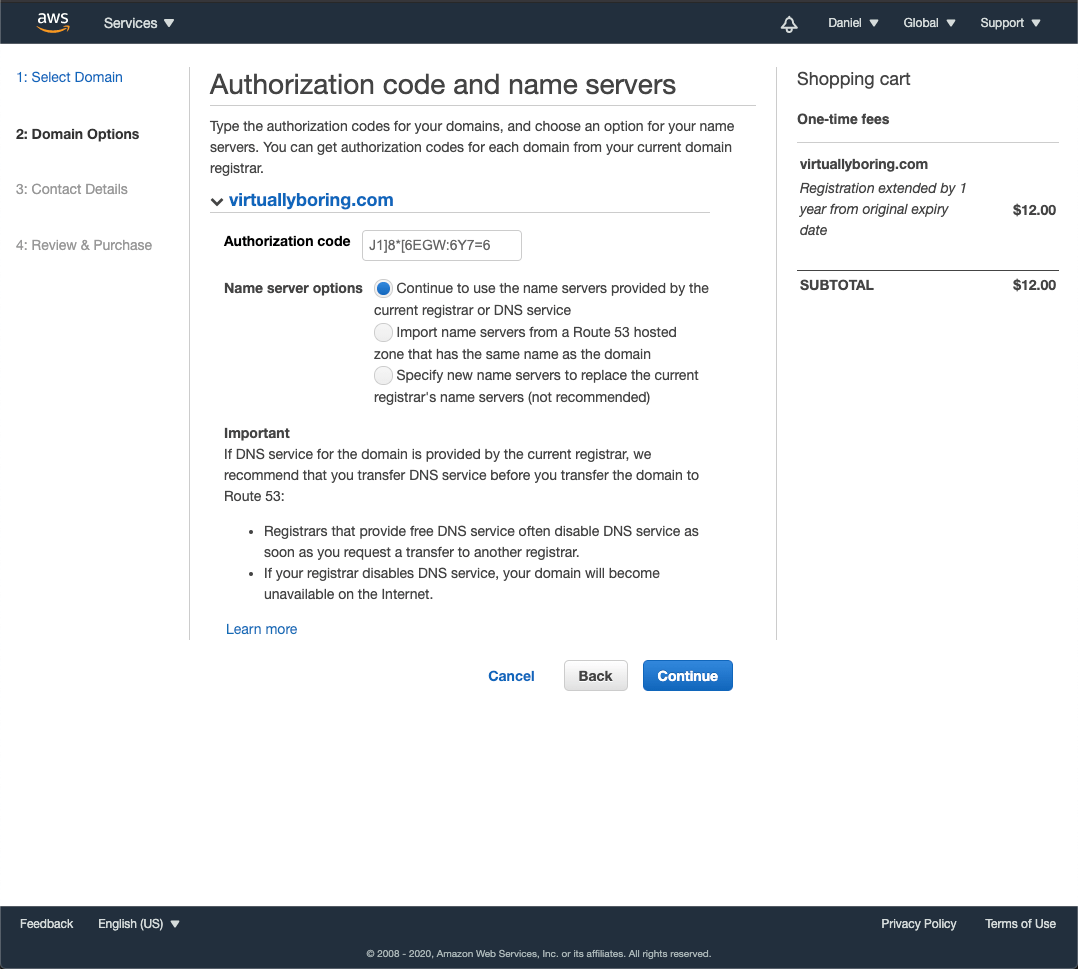
Enter the Authorization Code we got from Step 2 earlier then click Continue:
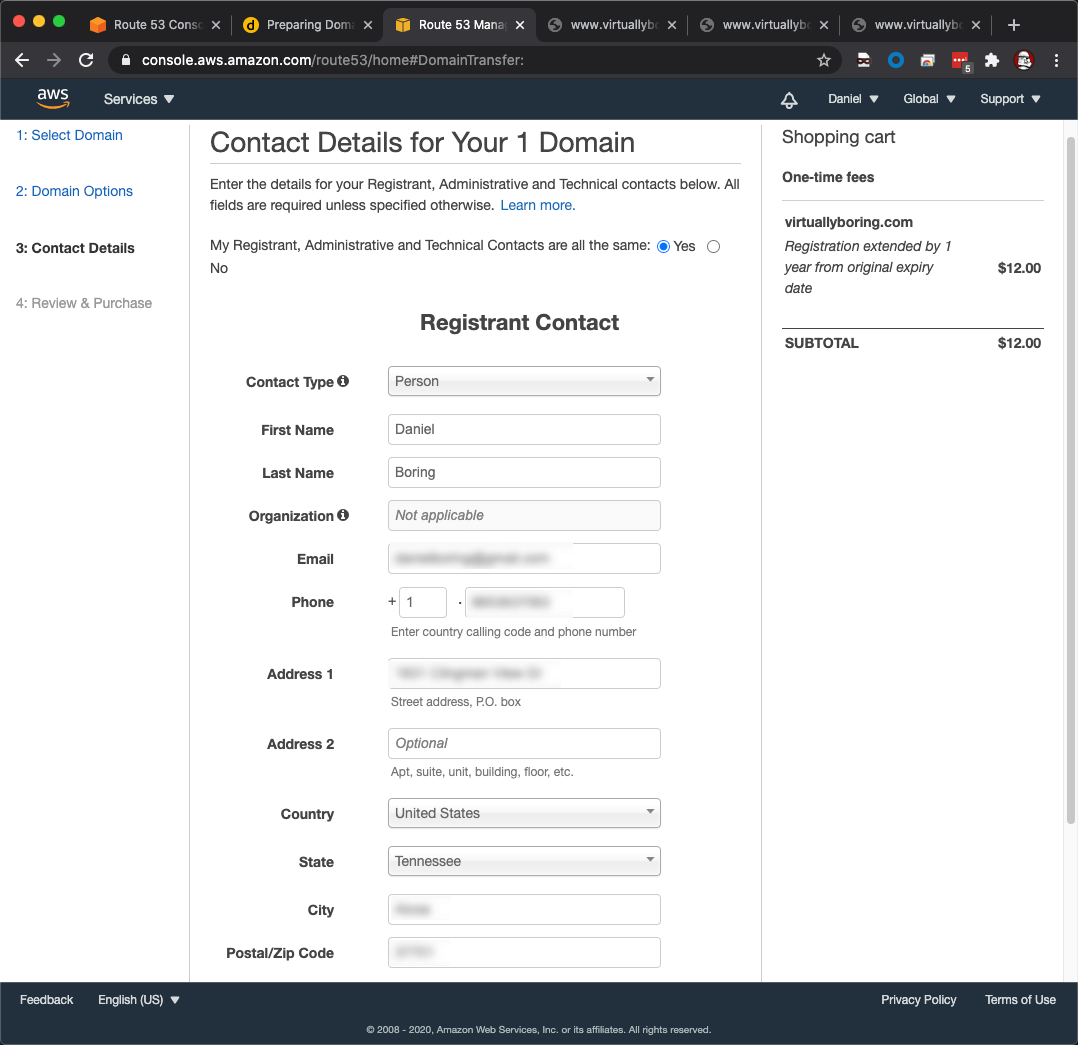
Enter your contact information for your domain
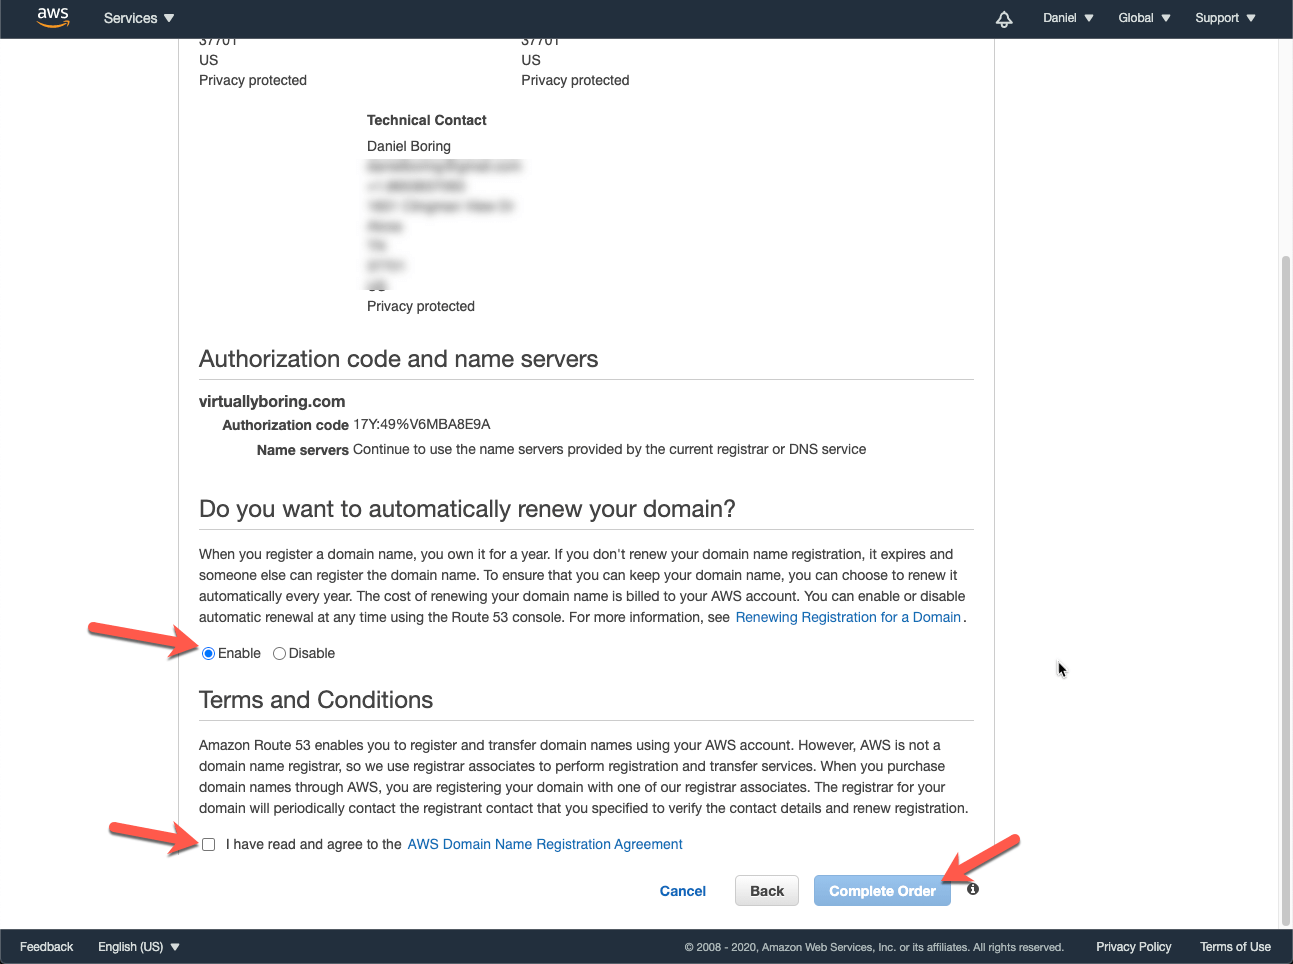
Make your selection if you want to Automatically Renew your domain, the Terms and Conditions must be accepted to continue. Click Complete Order
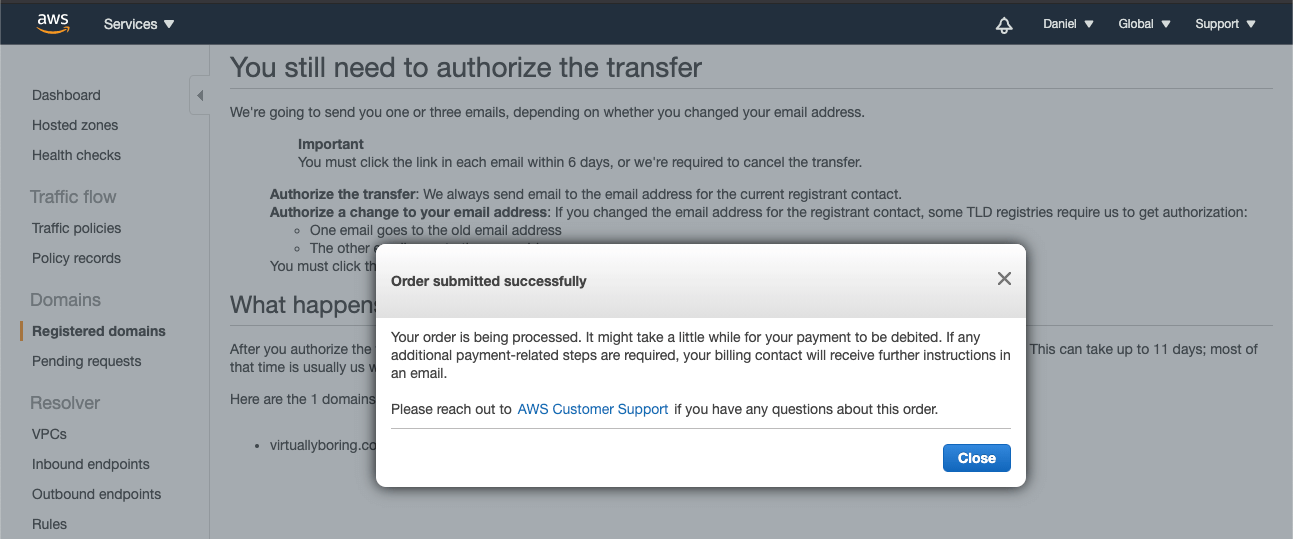
Order submitted!
Under Pending Requests you can see the status of your transfer request. If for some reason the transfer fails, AWS will refund the cost, in my case my .com transfer is $12 a year.
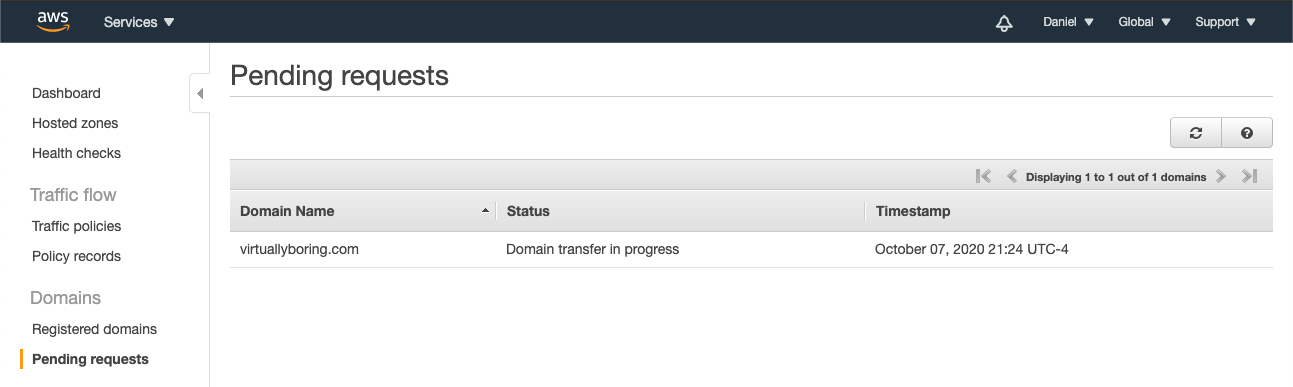
Keep hitting refresh on the request screen until you get the following message:
Domain transfer in progress: Waiting for the current registrar to approve the transfer. This can take up to 10 days depending on the TLD and the current registrar. (step 7 of 14)
This is good! We need to switch over to GoDaddy and accept the transfer request.
![]()
GoDaddy Console: In the GoDaddy console, under your Domain Pending Transfers you should see the request. Check the box and click Accept Transfer:
![]()
Will get a message saying request successful:
![]()
AWS Console: Back in AWS Route 53 console, check to Pending Requests to see if the transfer has completed. In my case it was super quick and my domain was already showing under Registered Domains!
![]()
Great post, did only the first part but saved me a lot of stress, thanks!
this is just great, helped me a lot!
I cannot accurately express my overwhelming gratitude for providing the depth and clarity of this step by step guide for a very complex process! You legend
Excellent instructions. Worked like a charm. Thank you!
Hello,
Excellent article and followed the same steps. However the ownership of the domain is in GoDaddy and maintained by a different team. I have created Route 53 hosted zone and shared name servers to GoDaddy domain team. Upon the update nslookup is rightly displaying the name servers but the ping is unable to find the hostname. Please let us know what I might have missed.
Thank you,
Babu HM
babuvsign@gmail.com